
REVIEW · CITY TOURS
Bean to bar Chocolate Workshop in Ho Chi Minh City
A cacao pod can be a chocolate bar in 2 hours. That’s the magic here: you go from pods to paste to a finished bar while learning how Vietnamese chocolate makers handle local cacao at Ban Cacao in Quận 1.
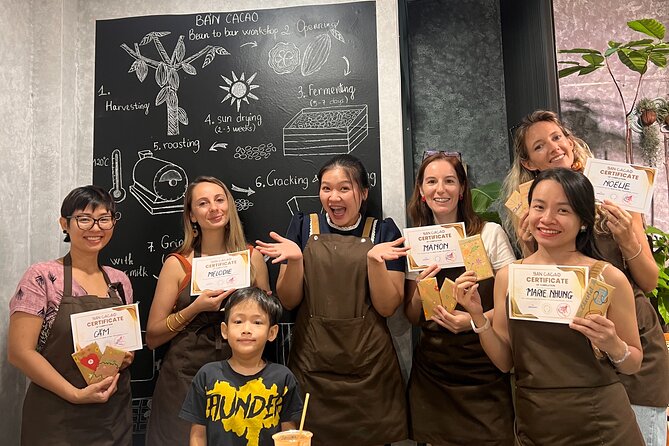
I especially like that the class is hands-on from the first step, not a sit-and-watch show. And I really like the ending: you finish your own bar, decorate it, and take it home with your own wrapping.
The only real thing to consider is that some steps take effort. Husking beans and grinding with a granite mortar can be tiring, so it’s not always a good fit for very small kids.
In This Review
- Key things to know before you go
- Where the Workshop Starts in Quận 1
- The 2-Hour Plan: Pods to Bars, Step by Step
- Fresh Cacao Pods: Tasting Before You Grind
- Husking Beans and Choosing Good Cacao
- Grinding Cacao Paste the Traditional Way
- Making Your Bar: Molds, Temperature, and Decoration
- What You Drink Along the Way (And Why It Helps)
- Price and Value: Is $32 Worth It?
- Who This Workshop Fits Best
- Should You Book Ban Cacao’s Bean-to-Bar Workshop?
- FAQ
- How long is the Bean to Bar Chocolate Workshop?
- Where does the workshop start in Ho Chi Minh City?
- What will I make during the workshop?
- Is there a maximum group size?
- What’s included besides the chocolate making?
- What is the cancellation policy?
Key things to know before you go
- Real bean-to-bar steps: taste pods, husk beans, make cacao paste, then form your bar
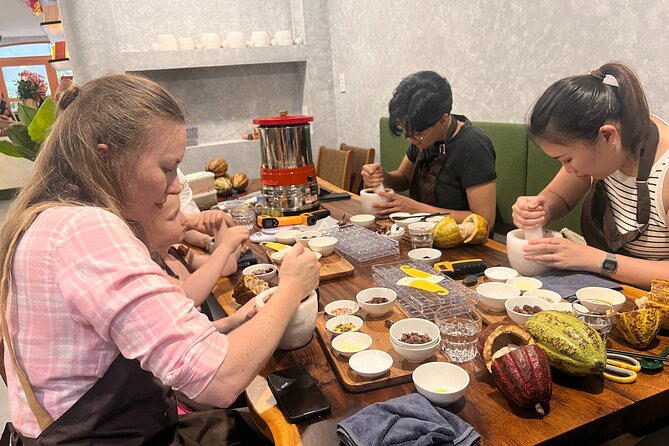
- Granite mortar grinding: traditional-style processing you can actually feel in your arms
- You decorate the chocolate: finished bar plus personally finished wrapping
- Small group size: max 10 travelers, so you’ll get help instead of being rushed
- Included cacao tastings and a drink: you get samples and a hot or iced chocolate drink
- Vietnam-focused context: you hear about cacao history in Vietnam and how local ingredients are used
Wider loops through the districts




Where the Workshop Starts in Quận 1
The workshop meets at 89/14 Hàm Nghi, Phường Nguyễn Thái Bình, Quận 1, Thành phố Hồ Chí Minh. This location is in the central part of the city, so it’s a convenient stop without a long ride across town.
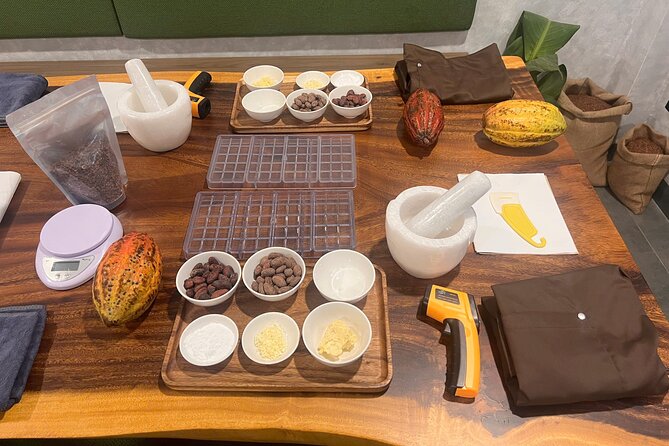
Ban Cacao is the chocolate maker behind the class, and that matters. Instead of touring a factory that feels like a black box, you’re working right where the product is made. The setup also keeps things practical: you can see what tools are laid out (granite mortar, thermometer, scale, chocolate mold, wrapping paper) and understand what each part of the process is trying to accomplish.
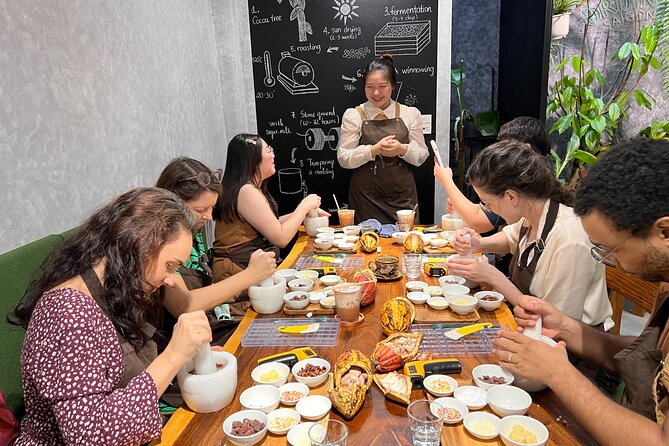
Also, the group size is capped at 10. In a small group, it’s easier to ask questions when you’re unsure about the next step, and it’s easier to keep moving through the process. A workshop like this can become a demo if the class is too big. Here, the cap helps keep it active.
Plan for about 2 hours on the clock. That’s enough time to learn the overall story of cacao in Vietnam, taste the raw ingredients, and still produce a finished bar. You won’t feel like you’re being rushed through the steps, but you also won’t have time to linger and chat for half the session.
The 2-Hour Plan: Pods to Bars, Step by Step
This is a classic bean-to-bar flow, taught in the order you’d actually need if you were making chocolate at home. You’ll get an explanation of the pods to bars process and the history of cacao in Vietnam, plus how Vietnamese makers turn local cacao into chocolate.
Then the workshop becomes practical. You’ll cycle through the stages:
First you taste fresh cacao pods. This is your reality check for what chocolate starts as. Next comes husking your own cacao beans. That part feels physical because you’re doing the work, not just watching it.
After that, you make cacao paste in a traditional way using a granite stone mortar. Finally, you produce your own chocolate bar from the first step through the end, then you decorate your chocolate and take it home in wrapping paper.
It’s a tight schedule, but the structure makes sense. You learn the purpose of each stage right as you’re doing it. For example, grinding isn’t treated like a random chore. It’s presented as the bridge between beans and a workable paste that can become a bar.
If you like food experiences where your hands do the work, this is exactly that. You’re not just sampling chocolate you already know. You’re seeing the process that explains why cacao tastes the way it does at each stage.
Fresh Cacao Pods: Tasting Before You Grind
Before you touch the “making” part, you taste fresh cacao pods. That’s one of the smartest choices in the whole session.
Raw cacao flavors can surprise you if you’re used only to supermarket chocolate. The pod tasting sets a baseline so you understand what you’re transforming. You also get a chance to connect taste to technique: later steps are about bringing out chocolate characteristics and shaping texture.
This isn’t a tasting-only class. You’re tasting the ingredient you’ll process. So when you learn about selecting good cacao beans, it lands better. You’re not memorizing a theory slide. You’re thinking, If that’s what fresh cacao tastes like, then what should a good bean feel or look like during husking?
And because the class includes context about cacao in Vietnam, the tasting is tied to a local story: how Vietnamese makers work with ingredients that grow nearby and how that shapes the chocolate-making approach.
One more practical upside: tasting early helps you stay engaged. Even if you’re not a chocolate super-fan, the process becomes easier to follow once you know what the raw ingredient tastes like.
Husking Beans and Choosing Good Cacao
Husking is where you really start appreciating the work behind “bean-to-bar.” You’ll husking your own cacao beans, and you’ll handle the material enough to understand why quality matters from the start.
The workshop also teaches you how to pick good beans as an initial step. Even if you’re not planning to make chocolate at home, this part teaches you a valuable skill: how to look at cacao as a crop, not just as a packaged product.
What I like about this stage is the balance. It’s hands-on, but it’s not chaotic. You’re doing the task in a guided way, which means you can ask questions while you’re sorting and preparing beans.
This is also a good reality check for time and effort. The process moves, and you’ll feel the physical side of cacao work. It’s not dangerous or overly technical, but it does require patience.
If you’re going with kids, this is usually where they’ll learn the fastest whether they’ll enjoy the class. Some kids love the hands-on part immediately. Others find husking and grinding slow. Based on what people commonly report from similar workshops, it’s usually a better fit for children around age 8 and up, since the grinding later can be tiring.
Where the locals drink, a few more spots
- Saigon After Dark With Seafood, Beer & Live Music Bar★ 5.0 · 158 reviews
- Jeep Tour Saigon By Night : FRESH SEAFOOD, STREET FOOD & SKY BAR★ 5.0 · 108 reviews
- Saigon Night Craft Beer and Street Food By Scooter and motorbike★ 5.0 · 87 reviews
- Ho Chi Minh City: Craft Beer and Local Food Tour by Scooter★ 4.9 · 68 reviews
- Private Jeep Street Food Tour and Night Roof Top Bar★ 5.0 · 30 reviews
Grinding Cacao Paste the Traditional Way
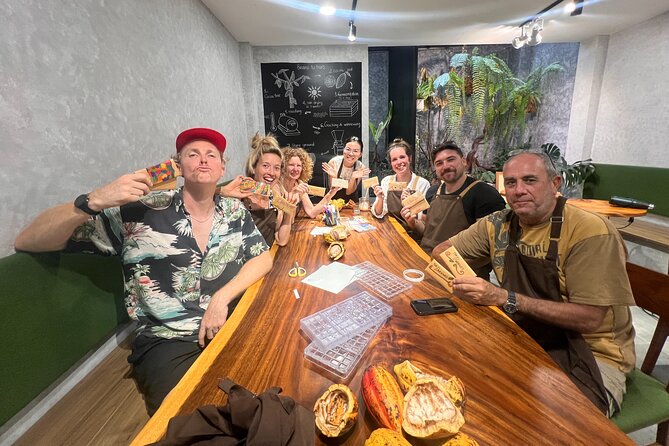
The traditional-style step is the granite stone mortar grinding. This is the part most people remember because you can feel the change happening under your hands.
You’ll make your own cacao paste using the mortar, and you’ll use tools that support careful making, like a thermometer and a scale. Those tools may seem fussy at first, but they’re there because chocolate has its own rules about temperature and consistency.
This stage is also where you learn that chocolate making isn’t one magical ingredient. It’s control. Grinding, measuring, and paying attention to temperature all contribute to texture and final results.
Be realistic: mortar grinding takes effort. It’s not like stirring batter. You’re applying pressure and working patiently until the paste is ready for the next stage. That’s why the class becomes such a good learning experience. You don’t just hear about traditional methods. You participate in them.
And because the workshop is small, you’re not left to brute-force the process alone. You can get help adjusting your technique when needed.
Making Your Bar: Molds, Temperature, and Decoration
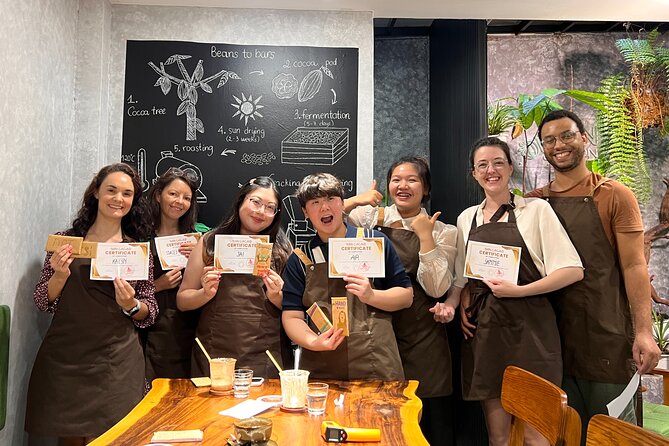
Once the paste stage is done, you’ll move into forming your own chocolate bar. The class covers the full flow from the first step to the final bar, so you aren’t left with “almost made it” energy. You’ll make a bar, and then you’ll finish it with decoration.
You’ll also work with a chocolate mold and tools like a thermometer to help with the chocolate-making process. Even without being a chocolate engineer, you’ll see how temperature and timing matter. Chocolate sets, melts, and thickens based on what you do and when you do it.
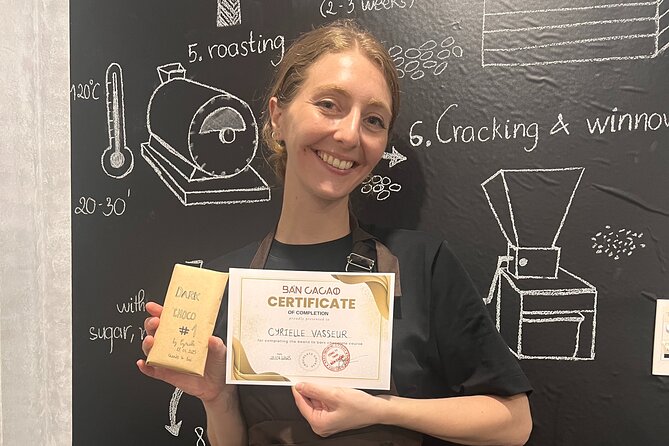
After your bar sets, you decorate your own chocolate and finish it using wrapping paper. This part is surprisingly satisfying. The goal isn’t just taste—it’s making something that feels like yours.
I also think the decoration step adds value. It turns the workshop from a class into a souvenir that reflects what you actually did. A plain bar is nice. A decorated bar with a wrapper you finished is more memorable and more giftable.
At the end, you can take your chocolate home. The workshop is designed so your work is the product, not just a lesson.
What You Drink Along the Way (And Why It Helps)
Most food workshops have a weird pacing problem: you start with excitement, then you’re stuck working hard while everyone waits for the next step. Here, you get a drink included.
You’ll get a drink each, and it’s described as either hot or iced chocolate. That’s a smart touch. It gives you a small break that still stays on-theme, and it lets you reset while you’re between steps.
It also helps first-timers. Even if you’re not sure what you’re tasting or making, the drink gives you something familiar while you learn the unfamiliar parts.
This matters because chocolate workshops are sensory. You’ll taste raw cacao, then work with paste and chocolate. Having a drink helps you transition between stages without losing the flow of the class.
Price and Value: Is $32 Worth It?
At $32 per person, this workshop lands in the “not cheap, but not crazy” zone for Ho Chi Minh City. Whether it’s worth it depends on what you want from the experience.
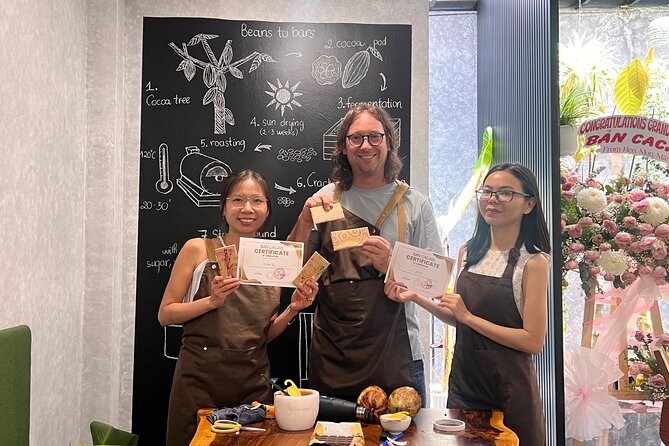
If you want a lecture and a small sample, you won’t feel like you got your money’s worth. You’re paying for participation. You’ll husk beans, grind cacao paste with a granite mortar, make your own bar, and decorate it. You also take the finished chocolate home.
That’s the value story. You’re not just buying chocolate. You’re buying labor, guidance, and a finished product that reflects your work. Plus, the small group size (max 10) makes the instruction feel more personal than in bigger classes.
There’s also a practical convenience factor: it’s about 2 hours, so you can fit it into a day of exploring. A workshop that runs too long can eat your sightseeing time. This one doesn’t.
And with the included drink and cacao tastings, the session feels like a full experience rather than an add-on activity.
If you’re the kind of traveler who likes hands-on food activities, I think the price is fair. If you just want to buy chocolate, you could do that anywhere. But if you want the why behind the taste, this is one of the more direct ways to learn.
Who This Workshop Fits Best
This workshop is a good match if you want an authentic, hands-on food activity in Quận 1. It’s also ideal if you’re curious about how Vietnamese chocolate makers work with local cacao and what traditional methods look like in practice.
It works well for:
- Food lovers who like to learn by doing
- Couples who want a shared activity with a real payoff (your finished bar)
- Families with older kids who can handle husking and grinding without melting down
- Travelers who want something different from the usual city sightseeing track
It may be less ideal if:
- You’re expecting something fully passive
- You’re bringing a very young child who struggles with repetitive, hands-on tasks
- You have limited energy for manual steps, since mortar grinding takes real effort
The small group size helps a lot, but your body still does the work at key points. If you know you’re sensitive to tired hands or repetitive tasks, think twice.
Should You Book Ban Cacao’s Bean-to-Bar Workshop?
I’d book it if you want a workshop where you actually make the product, not just taste it. The format is clear: taste pods, husk beans, grind cacao paste with the granite mortar, and then make and decorate your own bar.
The biggest reasons to say yes are simple. You get real process learning tied to what you taste, and you leave with something you made and finished. Add the included hot or iced chocolate drink, and the whole thing feels like a complete, satisfying afternoon plan.
If you hate hands-on food work, or you’re going with younger kids who won’t enjoy manual steps, you might find it more tiring than fun. But for most people who like food experiences, this is an easy recommendation.
FAQ
How long is the Bean to Bar Chocolate Workshop?
The class runs for about 2 hours.
Where does the workshop start in Ho Chi Minh City?
The meeting point is at 89/14 Hàm Nghi, Phường Nguyễn Thái Bình, Quận 1, Thành phố Hồ Chí Minh, Vietnam.
What will I make during the workshop?
You’ll make a cacao paste in a traditional style, then make your own chocolate bar, decorate it, and take it home.
Is there a maximum group size?
Yes. The workshop has a maximum of 10 travelers.
What’s included besides the chocolate making?
The class includes an explanation of the pods-to-bars process and the history of cacao in Vietnam, tasting fresh cacao pods, husking cacao beans, and a drink each. Tools and materials for making chocolate are also provided.
What is the cancellation policy?
Cancellation is free up to 24 hours in advance for a full refund.
Where the Locals Drink in Ho Chi Minh City


The Districts, One by One
More Tour Reviews in Ho Chi Minh City
Just Reviewed Around Saigon
- Secret walking Food Tour Ho Chi Minh City
★ 5.0 · 3 reviews - Ho Chi Minh City: Secret Cocktail Experience
★ 5.0 · 3 reviews - From Ho Chi Minh city: Vung Tau Beach Private Day Tour
★ 5.0 · 3 reviews - Saigoncholon
★ 3.5 · 3 reviews - Saigon On 2 Wheels
★ 3.5 · 3 reviews - From Ho Chi Minh City: Relax In Mui Ne Beach In 1 Day
★ 4.3 · 3 reviews
City Tours, compared.
 ★ 4.7Cu Chi Tunnels Morning or Afternoon TourFrom $1319,646 reviews
 ★ 5.0Cu Chi Tunnels Tour from HCM City – Morning or AfternoonFrom $1515,833 reviews
 ★ 4.5Mekong Delta Tour with Sampan JourneyFrom $1613,132 reviews
 ★ 5.0Ho Chi Minh City Street Food Tour & Sightseeing By MotorbikeFrom $289,413 reviews
 ★ 4.5Mekong Delta Guided Tour from Ho Chi Minh CityFrom $187,192 reviews
 ★ 4.8Cu Chi Tunnels Morning or Afternoon TourFrom $136,326 reviews
 ★ 5.0Private Street Food Evening Walking Tour in Ho Chi Minh CityFrom $493,175 reviews
 ★ 5.0Top Notch Street Food Motorbike Tour In Ho Chi Minh CityFrom $292,667 reviews
Browse the lists this tour appears in